
Operating Systems · Technoogies
How To Fix a Corrupt Font in Windows 10
What can happen when a font gets corrupted? It effects programs in odd ways. Crashes, display issues, files your trying to save, like my Adobe Illustrator file save issue. I don’t know all the issues it can cause or even how to spot the problem in some cases.
I’m not a Mac guy, so this is a tutorial of how to replace a corrupt font in Windows 10 only. I don’t have a problem with Macs or Mac-heads. I have my reasons for not using them; many.
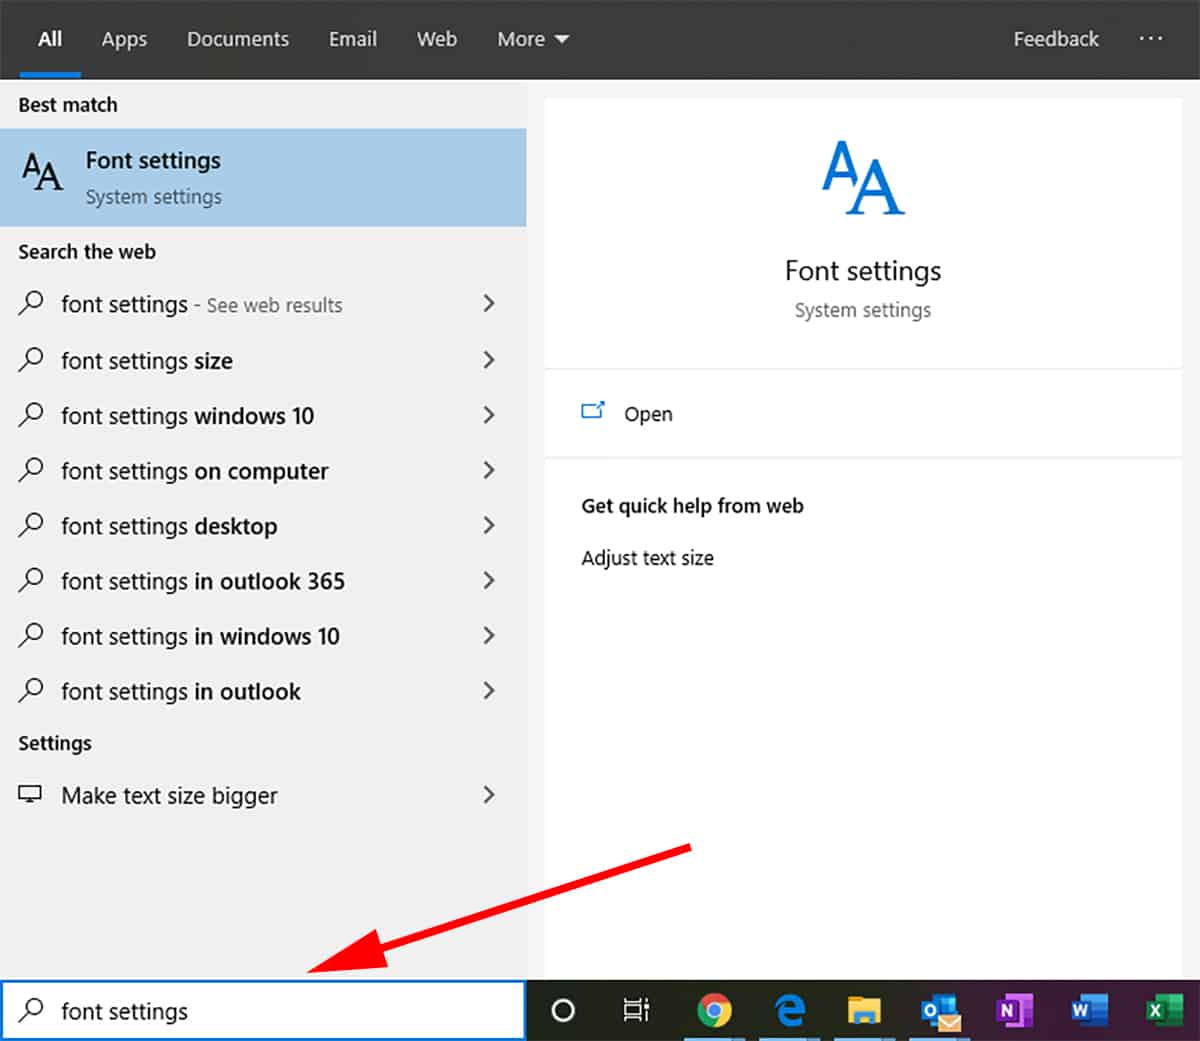
Open Font Settings
- type in the search field of the taskbar, “Font Settings”. Click to open font settings.
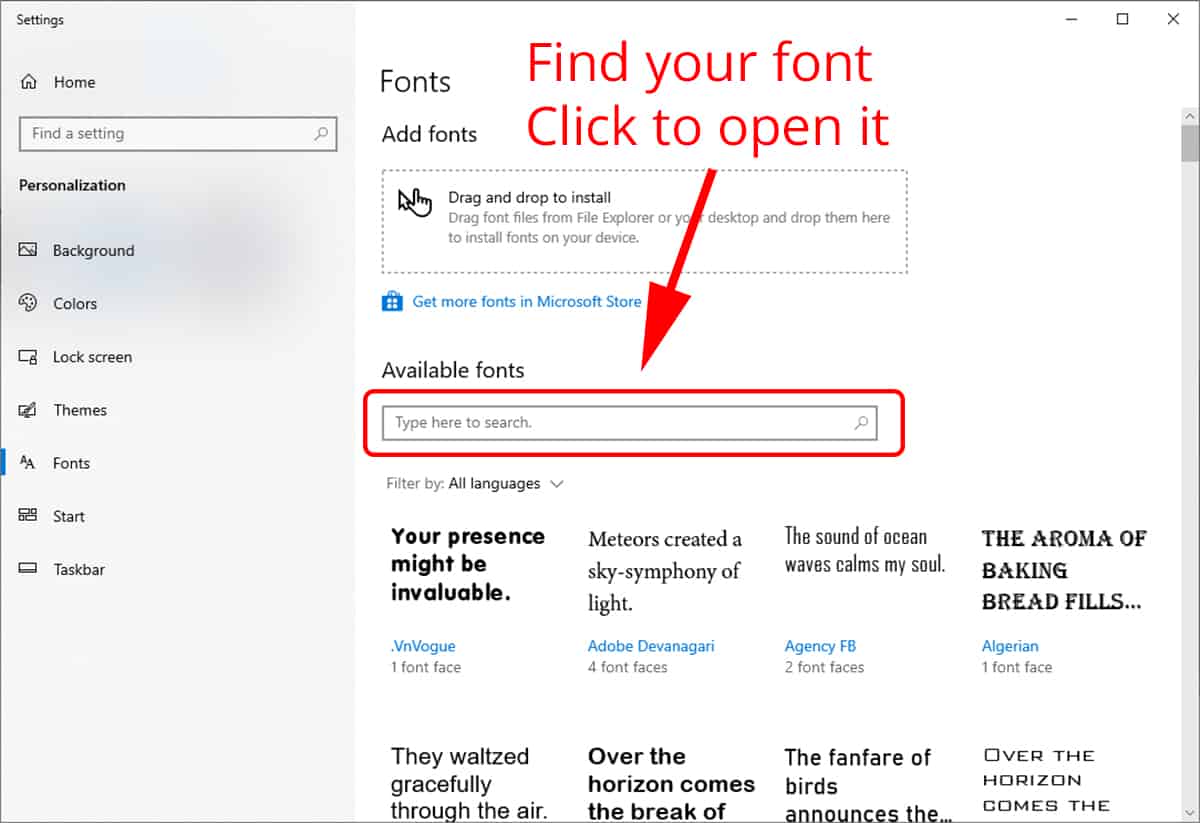
Search for your font by name
- Where it says “Type here to search.”, put the name of the font you’d like to remove or delete. It searches automatically, so there is no need to press enter. Click on the font to open it for removal.
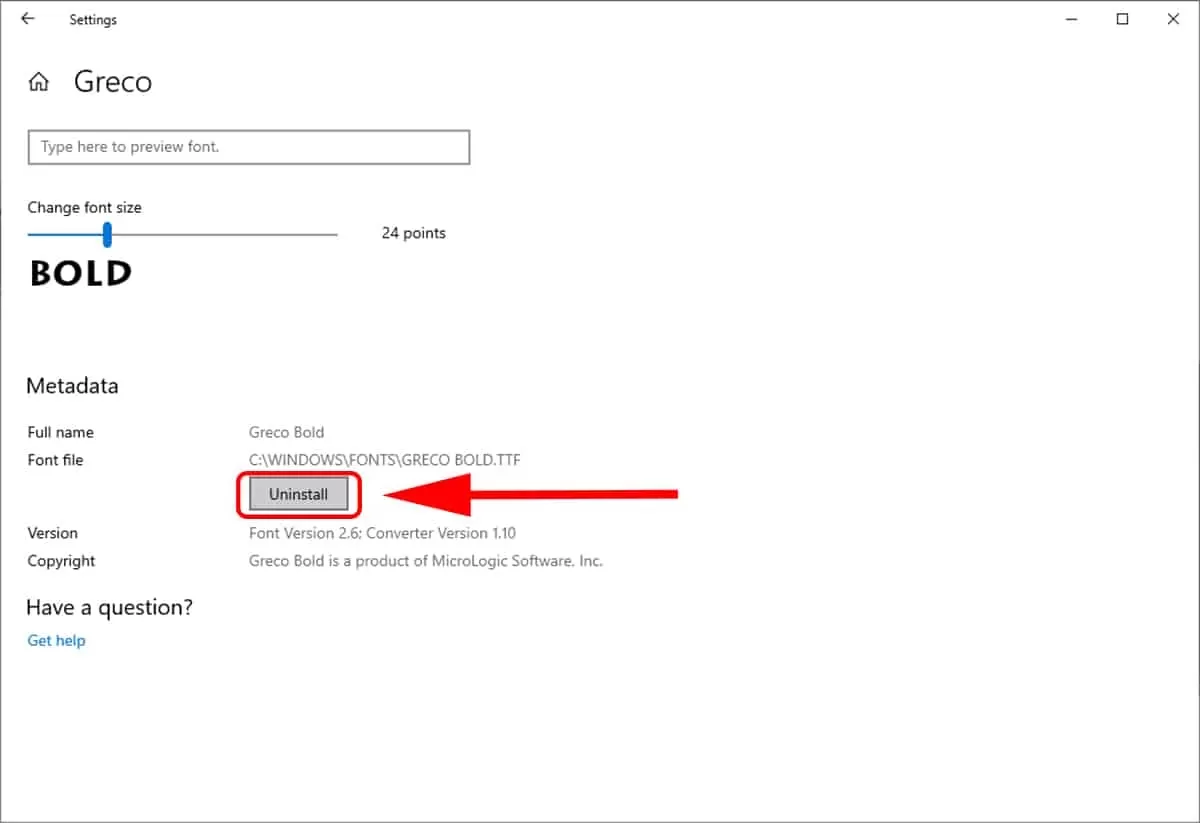
Uninstall the font
- Click on “Uninstall”. That’s it! Now to add it back in, assuming you have it saved somewhere.
Install your font the easy way – IMO
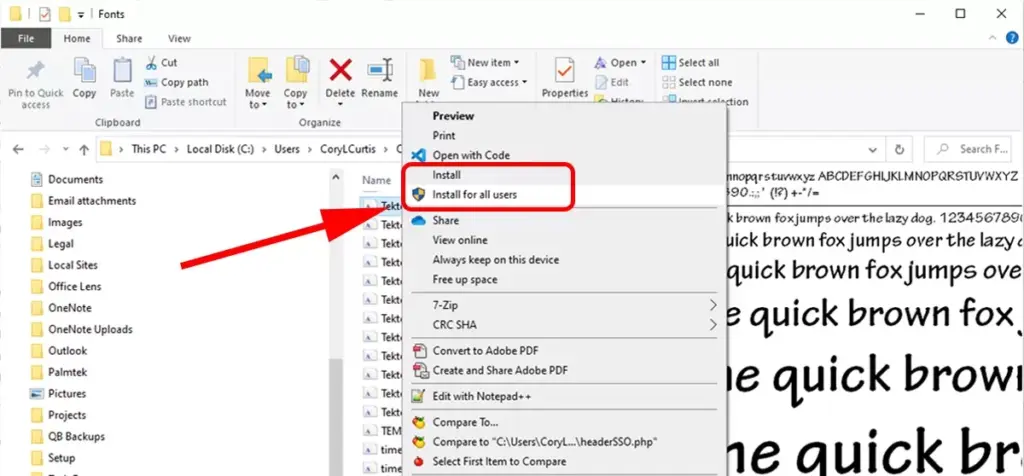
- Open Windows “File Explorer”. Locate the font you want and right-click for the context menu. Select either “Install”, or “Install for all users”.
(You must have administrative privilege to install for all users.)
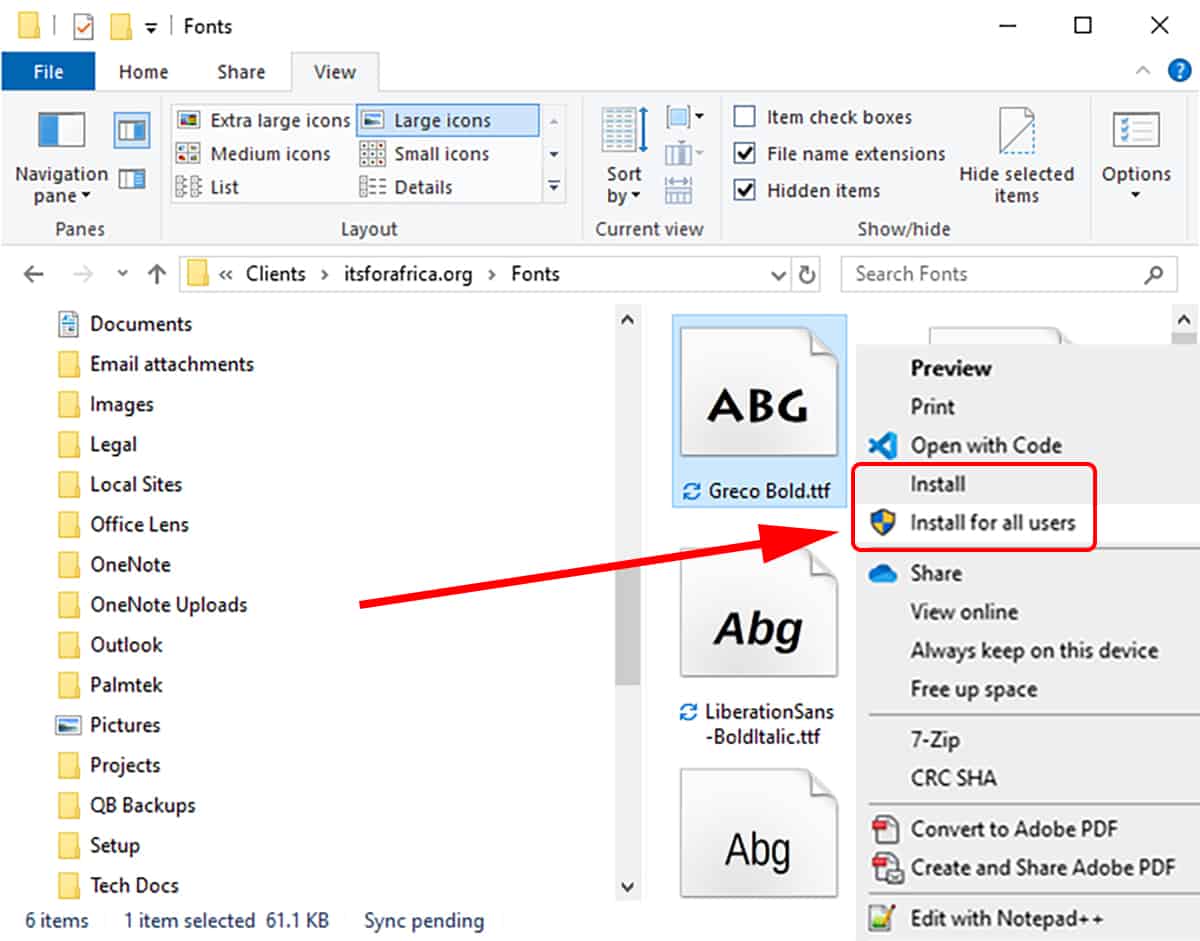
Easy-peasy!
Not hard at all, but here so you know where to look and how to fix broken fonts in Windows 10.


Leave a Reply